


-
Mi Portafolio de trabajos

-
Páginas
-
Diseño Web- Gráfico
- Curriculum Vitae (3)
- Diseño Grafico (47)
- Diseño Web (50)
- Illustrator (2)
- Impresión (1)
- Manualidades (3)
- Mi Portafolio de Trabajos (2)
- Otros (2)
- Photoshop (1)
- Tutoriales/Backgrounds/Vectores/PSD (41)
- Usabilidad Web (27)
-
Lo más reciente
-
Lo que más ha gustado
-
Delicious
-
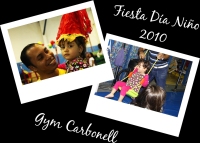
Jimena – Club Gimnastico Carbonell
Envoltura en forma de camisa
29 noviembre 2010 – 11:08 AM
Envoltura en forma de camisa
Materiales:
- Papel de regalo
- Tijeras
- Cinta scotch
- Engrapadora
- Camisa o camiseta hombre
- Cinta adorno


Marcos fotografías- Photoshop
27 noviembre 2010 – 12:17 AM

Lo primero que hacemos es seleccionar la parte de la foto que queramos que salga enmarcada, le damos a Selección – Transformar selección y la giramos un poquito….

Copiamos y pegamos para crear una capa solo con lo que hemos seleccionado…

Y ahora vamos a las opciones de fusión de la capa 1, le ponemos un trazo del color y el grosor que queramos, y le ponemos una sombra paralela mas o menos con estos datos…

Ahora a la capa fondo la podemos desaturar (Imagen – Ajustes – Desaturar), la podemos poner un desenfoque de lente (Filtro – desenfocar – Desenfoque de lente)…

Mi portafolio – Mis Trabajos
23 octubre 2010 – 11:02 PM
Los vídeos de Vodpod ya no están disponibles.
Mi portafolio – Mis Trabajos, posted with vodpod
Efecto de Agua en Photoshop
9 octubre 2010 – 7:13 AM
Efecto de Agua en Photoshop
Step 1
First off, create a new document with a white background and set the canvass size at 500 by 600 px. Increase the resolution of the document to 260 pixels. Select the Rectangular Marquee Tool (M) and draw a vertical rectangle all the way down to the canvass.

Step 2
Now select the Gradient Tool (G) and on the Gradient Tool Presets or settings, click to edit the gradient. From the left-hand side, these are the colours of the «stops.» 1.#c8d3df 2.#e8edee 3.#c4c9cf 4.#e4e7e9 5.#98999a 6.#c1cad3 7.#f6f7f8. For the Opacity Stops from the left: 60%; 65%; 50%; 60%.

Step 3
As shown below, drag the Gradient Tool within the Marquee selection.

Step 4
From the left, drag the Gradient Tool across the selection in a slightly diagonal direction.

Step 5
From the right, drag again downwards.

Step 6
Finally, from the left, drag the Gradient Tool diagonally upwards.

Step 7
Go to Filter > Artistic > Plastic Wrap and in the options, set the Highlight Strength to16; Detail to 10; Smoothness to 8. Deselect the Marquee also.

Step 8
Now to add more shine. Go to Filter > Sketch > Bas Relief and make the adjustments below:

The resulting effects:

Step 9
On the menu bar, select Image > Adjustment > Levels (Ctrl+L). Enter these figures for the Input Levels as shown below. The end result is to give one half of the image a faint shade or tone.

Step 10
Go to Image > Adjustments > Curves or press (Ctrl+M) and drag downwards the bottom point of the curve. Or you may enter the Input/Output figures.

The purpose of Curves is to tone just the bottom part of the image.

Step 11
To shape the image, go to Edit > Transform > Warp or hit Ctrl+T. Upon shaping with the Warp, make sure the topmost white part of the image is visible as a long long strip.

Name the layer «flow.»

Step 12
We’ll now add a splash to the streaming flow of water. In a new layer, draw an ‘amoebic’ shape (if you’ll pardon the expression) with the Pen Tool (P) and fill with #e0e0e9.

Step 13
Still on the «splash» layer, go to Filter > Artistic > Plastic Wrap and make the adjustments below. Follow this up with a Bas Relief effect (Filter > Sketch > Bas Relief). Do make sure Light is set to Bottom Left.

The result:

Step 14
Now to create a proper splash-like shape. Go to Filter > Liquify (Shift+Ctrl+X) and select the Forward Warp Tool ![]() in the Liquify window.Under the Tool Options, set Brush Size at 11, Density at 50 and Pressure at 60. Now with the Forward Warp Tool, extend edges of the shape in various directions.
in the Liquify window.Under the Tool Options, set Brush Size at 11, Density at 50 and Pressure at 60. Now with the Forward Warp Tool, extend edges of the shape in various directions.

Step 15
Select the Bloat Tool (B) and hold down briefly to create bloated portions of the image. the Brush Pressure and Size could be adjusted slightly according to your personal preference. Just don’t make the brush too sensitive by increasing it’s Pressure.


Step 16
Add a Bas Relief effect: Filter > Sketch > Bas Relief.

Step 17
In a new layer, draw a shape with the Rectangle Tool (U) that would form the background. Add a Gradient Overlay Layer Style and set the colours of the Stops from the left: 1.#9397a0 2.#252d4f 3.#6b7074. Reduce the opacity of the «background» layer to 50%.

Step 18
Select the Burn Tool and choose a soft brush at 8px , the Range set to Midtones and Exposure reduced to 45%. Now, apply the tool across the base of the splash.

Step 19
Duplicate the «splash» layer and with the Free Transform Tool (Ctrl+T), right click to select Rotate 90 degrees CW .After which you right click again to select Flip Horizontal. Reduce the «splash» layer opacity to about 65%.With the Eraser Tool (E), Opacity at 40% fade the top part the splash shape.

Step 20
Create a new layer and pick the Rectangle Tool to draw a rectangle right below the splash shape. Add a Gradient Overlay style and edit the Gradient as shown below:


Step 21
Blur the edges of the rectangle by going to Filter > Blur > Guassian Blur. Set the Radius to about 35 px.

Step 22
Reduce the «flow» layer’s opacity to 90% and set the Blend Mode to Hard Light. Do the same for the «splash» layer except its opacity should be left unchanged. Also have this layer sharpened twice (Sharpen > Sharpen)to make the splash a little more ‘crisp’ to say the least.
B.
If you have the Bubbles Brush though I can’t recall right now if it with came preloaded with Photoshop or I downloaded it from somewhere. But a Soft Round Brush can still serve the same purpose. A new layer should be created for more intricate splashes and brush color set at #f7f7fa. Have both the «splashes» and «splash» layers sharpened.
.
Step 23
Though I intended the above image should be the final one, not being satisfied, I duplicated the «background» layer and change the Gradient Style to Radial. The colour of background (more importantly a dark one) determines the look of your water effect when the Blend Mode is set to Hard Light. Therefore, you can create different variation of your water effects.

Step 24
For more realism, I set the Blend Mode of both the «flow» and «splash» layers to Pin Light. For this gave the water effect more transparency. The duplicated «background» layer was hidden as well.

Step 25
Here the duplicated «background» layer was enabled and as a result the flowing water was given more visibility. I however ‘thirst’ to use these techniques to create more complex compositions or artworks involving human figures.

Step 26
For the final image, I used the free Transform Tool’s Distort Tool to make the flow of water narrower. Well, this is where the tutorial ends for now.
Efecto de agua en Photoshop
8 octubre 2010 – 6:04 PM
Efecto de Agua en Photoshop
Step 1
First off, create a new document with a white background and set the canvass size at 500 by 600 px. Increase the resolution of the document to 260 pixels. Select the Rectangular Marquee Tool (M) and draw a vertical rectangle all the way down to the canvass.

Step 2
Now select the Gradient Tool (G) and on the Gradient Tool Presets or settings, click to edit the gradient. From the left-hand side, these are the colours of the «stops.» 1.#c8d3df 2.#e8edee 3.#c4c9cf 4.#e4e7e9 5.#98999a 6.#c1cad3 7.#f6f7f8. For the Opacity Stops from the left: 60%; 65%; 50%; 60%.

Step 3
As shown below, drag the Gradient Tool within the Marquee selection.

Step 4
From the left, drag the Gradient Tool across the selection in a slightly diagonal direction.

Step 5
From the right, drag again downwards.

Step 6
Finally, from the left, drag the Gradient Tool diagonally upwards.

Step 7
Go to Filter > Artistic > Plastic Wrap and in the options, set the Highlight Strength to16; Detail to 10; Smoothness to 8. Deselect the Marquee also.

Step 8
Now to add more shine. Go to Filter > Sketch > Bas Relief and make the adjustments below:

The resulting effects:

Step 9
On the menu bar, select Image > Adjustment > Levels (Ctrl+L). Enter these figures for the Input Levels as shown below. The end result is to give one half of the image a faint shade or tone.

Step 10
Go to Image > Adjustments > Curves or press (Ctrl+M) and drag downwards the bottom point of the curve. Or you may enter the Input/Output figures.

The purpose of Curves is to tone just the bottom part of the image.

Step 11
To shape the image, go to Edit > Transform > Warp or hit Ctrl+T. Upon shaping with the Warp, make sure the topmost white part of the image is visible as a long long strip.

Name the layer «flow.»

Step 12
We’ll now add a splash to the streaming flow of water. In a new layer, draw an ‘amoebic’ shape (if you’ll pardon the expression) with the Pen Tool (P) and fill with #e0e0e9.

Step 13
Still on the «splash» layer, go to Filter > Artistic > Plastic Wrap and make the adjustments below. Follow this up with a Bas Relief effect (Filter > Sketch > Bas Relief). Do make sure Light is set to Bottom Left.

The result:

Step 14
Now to create a proper splash-like shape. Go to Filter > Liquify (Shift+Ctrl+X) and select the Forward Warp Tool ![]() in the Liquify window.Under the Tool Options, set Brush Size at 11, Density at 50 and Pressure at 60. Now with the Forward Warp Tool, extend edges of the shape in various directions.
in the Liquify window.Under the Tool Options, set Brush Size at 11, Density at 50 and Pressure at 60. Now with the Forward Warp Tool, extend edges of the shape in various directions.

Step 15
Select the Bloat Tool (B) and hold down briefly to create bloated portions of the image. the Brush Pressure and Size could be adjusted slightly according to your personal preference. Just don’t make the brush too sensitive by increasing it’s Pressure.


Step 16
Add a Bas Relief effect: Filter > Sketch > Bas Relief.

Step 17
In a new layer, draw a shape with the Rectangle Tool (U) that would form the background. Add a Gradient Overlay Layer Style and set the colours of the Stops from the left: 1.#9397a0 2.#252d4f 3.#6b7074. Reduce the opacity of the «background» layer to 50%.

Step 18
Select the Burn Tool and choose a soft brush at 8px , the Range set to Midtones and Exposure reduced to 45%. Now, apply the tool across the base of the splash.

Step 19
Duplicate the «splash» layer and with the Free Transform Tool (Ctrl+T), right click to select Rotate 90 degrees CW .After which you right click again to select Flip Horizontal. Reduce the «splash» layer opacity to about 65%.With the Eraser Tool (E), Opacity at 40% fade the top part the splash shape.

Step 20
Create a new layer and pick the Rectangle Tool to draw a rectangle right below the splash shape. Add a Gradient Overlay style and edit the Gradient as shown below:


Step 21
Blur the edges of the rectangle by going to Filter > Blur > Guassian Blur. Set the Radius to about 35 px.

Step 22
Reduce the «flow» layer’s opacity to 90% and set the Blend Mode to Hard Light. Do the same for the «splash» layer except its opacity should be left unchanged. Also have this layer sharpened twice (Sharpen > Sharpen)to make the splash a little more ‘crisp’ to say the least.
B.
If you have the Bubbles Brush though I can’t recall right now if it with came preloaded with Photoshop or I downloaded it from somewhere. But a Soft Round Brush can still serve the same purpose. A new layer should be created for more intricate splashes and brush color set at #f7f7fa. Have both the «splashes» and «splash» layers sharpened.
.
Step 23
Though I intended the above image should be the final one, not being satisfied, I duplicated the «background» layer and change the Gradient Style to Radial. The colour of background (more importantly a dark one) determines the look of your water effect when the Blend Mode is set to Hard Light. Therefore, you can create different variation of your water effects.

Step 24
For more realism, I set the Blend Mode of both the «flow» and «splash» layers to Pin Light. For this gave the water effect more transparency. The duplicated «background» layer was hidden as well.

Step 25
Here the duplicated «background» layer was enabled and as a result the flowing water was given more visibility. I however ‘thirst’ to use these techniques to create more complex compositions or artworks involving human figures.

Step 26
For the final image, I used the free Transform Tool’s Distort Tool to make the flow of water narrower. Well, this is where the tutorial ends for now.
Texto 3D agua- Tutorial Photoshop CS5
8 octubre 2010 – 4:13 PM
Texto 3d agua – Tutorial Photoshop SC5

Nota: click en la imagen para ver en tamaño real
Así es, en este tutorial te mostraré cómo crear un texto de agua. Aunque puede parecer algo complicado pero es un efecto muy simple. Vamos a utilizar el repujado (repousee) y algunas fotos de agua para crear el efecto.
Paso 1
Abrir Photoshop y crear un nuevo documento. Llenar la capa de fondo con negro y usar la herramienta Pincel (B). podes utilizar el que yo hice que esta el final del tutorial (archivo PSD)

Paso 2
Si creas un texto con la herramienta pincel lo pegas como mapa de bits, crea una selección de la zona que deseas aplicar repujado. Con la selección activa ir a 3D> repujado> Selección actual.

Paso 3
Para crear el efecto del agua vamos a utilizar el preset Inflar y utilizar casi los mismos valores por defecto, el tipo Inflar 3D. Cambiar la profundidad a 0 y la Escala de a 1, también para la inflar, cambiar las diapositivas al frente y la cara.

Paso 4
Notaras de que la E será un bloque sólido, a continuación, selecciona el área que desea ser un agujero y luego cambiar el tipo de agujero. También aumentar la fuerza de la Inflar a 1.

Te debe de quedar asi…

Paso 5
Selecciona la inflación frente a la paleta de 3D y luego haga clic en la carpeta junto a los valores. Selecciona Abrir para abrir la textura de la textura en un nuevo documento. Luego, en este nuevo documento crea una nueva capa e ir a Filtro Render> Nubes>. Asegurate de que estás utilizando en blanco y negro para los colores. Después de que ve a Filtro Render> Nubes diferentes>. Si el resultado es demasiado oscuro, ve a Imagen> Ajuste> Niveles, a continuación, aumente la entrada de blancos. Esta textura será el mapa de relieve, que distorsionan nuestro texto en 3D.
Para los otros valores, el uso de color blanco para el color difuso,% Opacidad 15, 20 para la Reflexión, Negro para la iluminación, el 100% del brillo y 1,5 para la refracción.

Paso 6
Ahora para hacer nuestro efecto más realista vamos a mezclar un poco de fotos de archivo. El que usé es de stock.xchng ( http://www.sxc.hu/photo/884261 y http://www.sxc.hu/photo/1131843 ). Abra estos dos imágenes en Photoshop. Copia algunas partes de la salpicadura del agua de las fotos y pegarlo en nuestra imagen en 3D.

Paso 7
Repite el proceso, copiar y pegar más salpicaduras. Como las salpicaduras de agua de las fotos tienen fondo negro, solo cambia el modo de fusión a la pantalla, por lo que el negro será transparente.

Paso 8
Tiempo para generar nuestro objeto 3D. En la paleta de 3D para cambiar la calidad de Ray Trazado final. Tomará unos minutos para hacer que el objeto 3D por que tiene que renderizar todo las luces textura etc. Si desea cambiar las luces que puedes hacerlo.

Paso 9
Duplicar el objeto 3D ir a Capa> Rasterizar> 3D. Voy a rasterizar el objeto 3D para que pueda aplicar un poco de ajustes de imagen, yo podría hacer eso con la capa 3D, pero algunos no funcionan de la manera que quiero o que puede ser un poco lento.
Añadir una nueva capa y lo rellenamos de negro, y luego fusionar la capa de color negro con la capa rasterizada 3D. Después de que ir a Ajustes de la imagen>> Niveles. Utiliza 15 para el Negro, 0,8 para el Gris y 160 para las entradas Blanca.

Paso 10
Selecciona todas las capas y duplicarlos. Después de que vaya a Filtro> Blur> Gaussian Blur. Utiliza 15 para la cantidad. Después de que el cambio del modo de fusión a Color Dodge y la Opacidad al 30%.

Conclusión
Reflejo en el mar- Tutorial Photoshop
8 octubre 2010 – 4:06 PM
Reflejo en el mar- Tutorial Photoshop

After creating a new document, select a light shade of blue, saturated to 100%
for you foreground colour.
Select white for your background colour.
Either use a cloud filter to create a cloud texture over the entire image, or
fill with your foreground colour and paint in the clouds with white using a
large soft brush.

Select Image>Adjustments>curves.
Adjust the curves so the blue becomes darker.
The curves option allows you to maintain the hue and saturation of the image
while darkening the midtones.

You should see something like this:

Water on tap – tutorial Photoshop
8 octubre 2010 – 3:54 PM
WATER ON TAP

|
|
Let’s start with a new document 500×500 pixels Press «D» to reset your color palletes to black and white. Create a new layer, then apply the following filter: |
|
|
Apply: Filter » Blur » Gaussian Blur Apply: Filter » Blur » Motion Blur |
|
|
Now go to Image » Image Size |
|
|
Next, go to Filter » Artistic » Plastic Wrap Apply Filter » Sketch » Chrome |
|
|
Go to Edit » Fade Chrome |
|
|
Now go to Image » Image Size |
|
|
Now go to Edit » Transform » Warp |
|
|
Now, just add some gradient color to the background layer, and change it’s water layer’s blending mode to «Hard Light» |
Here is an image I made, simply by adding the above water’s layer to a picture of a tap.
CLICK HERE TO DOWNLOAD PSD FILE
Agua saliendo – tutorial Photoshop
8 octubre 2010 – 3:49 PM
Agua saliendo
Start by opening an image of a tap. We’ll create water flowing from the tap.

Using pen tool create path of a water.


Create a new layer and Ctrl+click the path layer to get the path selection.

Fill the selection with white color.

From select menu apply modify>>contract.

Contract the selection by 2 pixels.

Fill the selection with black color.

Similarly contract again and fill it with white and then with black color.


From filter menu select distort>>glass.

Apply settings as shown.


Dupliacte the layer and change the color mode to color burn.


Select blur tool from the main tool bar.

Select both the water layer and press Ctrl+E to merge. Blur the merged water layer.

Press Ctrl+U to open hue/saturation window. Apply settings as shown.


